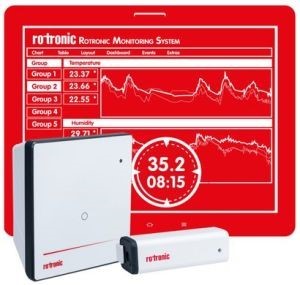
Data integration is one of the primary requirements for many of our monitoring system customers.
The Rotronic Monitoring System’s (RMS) core functionality provides excellent graphing, statics and reporting, however here we are discussing the tools that will be utilized for Machine to Machine (M2M) integration.
Machine to Machine (M2M) integration is absolutely critical since data is increasingly used for a variety of reasons through businesses. So while RMS provides a very secure and adaptable framework for monitoring and alarming, there are many weird and wonderful functions that it cannot offer. In this instance, we must extract the data out and use it elsewhere.

Getting Data out of the Rotronic Monitoring System (RMS)
RMS is an SQL based system so we could of course query the SQL directly however, there are many limitations with this approach especially security. Also via our RMS cloud platform absolutely no direct SQL access is available to end users.
Instead RMS supports a RESTful API, we’ll use a simple example to go through the basic steps.
RMS GET API
As before I’ll use some Python scripts in this example but if you prefer, POSTMAN is a great tool for testing these types of APIs.
Let’s breakdown the steps:
1. Request API token using your username and password
2. Use Token to request specific data
3. Use data as required
Step 1 – Request a Token
For security reasons you cannot simply send a request and get whatever data you desire. First you must request a token from RMS. The token is linked to a user account and will only allow the data that is visible by that user to be accessed. When requesting a token you can also specify how long it is valid for. The maximum length is 30 days.
import json

import requests


url = ‘https://rms.rotronic.com/RMS/API/RequestToken.ashx’

headers = {‘Content-Type’ : ‘Application/json’, ‘Expect’ : ‘100-continue’, ‘Connnection’ : ‘Close’, ‘Host’ : ‘rms.rotronic.com’}

UsrID = “1”

User= “Jeremy”

PW = “########”

Exp = “30”

get_payload = {‘UserId’:UsrID,’Username’:User,’Password’:PW,’RequestType’:’ DataHistory’,’ExpirationDays’: Exp}

api_get = requests.post(url, headers=headers, data =json.dumps (get_payload))

token = json.loads(api_get.content)

token = token.get(‘Token’)
The above request with suitable credentials will return something along these lines.
{‘UserId’: 1, ‘RequestType’: ‘DataHistory’, ‘Token’: ‘jUsTaNeXaMpLe_HRwOi8vd3d3LnczLm9yZy8yMDAxLzA0L3htbGRzaWctbW9yZSNobWFjLXNoYTI1NiIsInR5cCI6IkpXVCJ9.eyJVc2VySWQiOjM5MzEsIlJlcXVlc3RUeXBlIjoiRGF0YUhpc3RvcnkiLCJFeHBpcmF0aW9uIjoiMjAxOS0wNC0wM1QxNToyMzoyMC44MTgwODM4WiJ9.rtHHKvrE-7jnMNHUGazso_jUsTaNeXaMpLe’, ‘Status’: ‘OK’}
The API token being the jumble of text above. With the token in hand we can proceed with requesting our data.
Step 2 – Request Data
To request data we need the measuring point ID for the data we need which can be obtained from the RMS interface (every measured parameter has a unique ID within RMS that will not change and cannot be reused). We also define the From and To ranges as well as the number of values we wish to obtain (Count).
import json

import requests

url = ‘https://rms.rotronic.com/RMS/API/DataHistory.ashx’

headers = {‘Content-Type’ : ‘Application/json’, ‘Expect’ : ‘100-continue’, ‘Connnection’ : ‘Close’, ‘Host’ : ‘rms.rotronic.com’}

MPTID = “20”

From = “2019-03-04T08:00:00”

To = “2019-03-04T09:00:00”

Count = “10”

Token = “token from step 1”

post_payload = {‘ID’: MPTID,’From’: From,’To’:To,’Count’:Count,’Order’:’Asc’,’Token’: Token}

api_get = requests.post(url, headers=headers, data =json.dumps (post_payload))

data = json.loads(api_get.content)

print (data)
The above request with suitable details will return something along these lines.
{‘Status’: ‘OK’, ‘ID’: 20, ‘Name’: ‘Humidity-18071604′, ‘Parameter’: ‘Humidity‘, ‘Unit’: ‘%rh‘, ‘Data’: [{‘Time’: ‘2019-03-04T08:00:14+01:00′, ‘Value’: ‘29.45%rh‘}, {‘Time’: ‘2019-03-04T08:05:14+01:00’, ‘Value’: ‘29.80%rh’}, {‘Time’: ‘2019-03-04T08:10:14+01:00’, ‘Value’: ‘29.61%rh’}, {‘Time’: ‘2019-03-04T08:15:14+01:00’, ‘Value’: ‘29.29%rh’}, {‘Time’: ‘2019-03-04T08:20:14+01:00’, ‘Value’: ‘29.80%rh’}]}
Step 3 – Use the data
So we have our data in JSON format from here it’s an easy step to chopping out the specific values and handing them over to some other code, machine or simply displaying them for yourself.
The flexibility of RMS is an important requirement for our customers especially those with existing systems. Using RMS as the central platform ensures precision measurements, secure and reliable data collection and easy access to data. Using our APIs then allows this data to be utilised in wider business operations.

Customer examples using the API include
- Live temperature data included in packaging labels
- Automated calibration certificate generation using reference values from RMS
- Visualisation of RMS data on 3rd party software for building efficiency displays
Conclusion
This post focuses on our RESTful API, although we have a variety of alternative data integration possibilities, such as relay output modules, analogue output modules, and direct SQL connections. Additionally, our RMS-Integrator hardware supports direct device communication with devices via MODBUS, SNMP and MySQL.
So the message is simple; if you have requirements the Rotronic Monitoring System RMS can typically meet them. Please contact us and we will be pleased to discuss your project. No matter how big or small it is.
Learn more about RMS
Author:
Jeremy Wingate
Sales Manager Environmental Monitoring System Department
Related Products
Rotronic Continuous Monitoring System RMS
Want to see more information like this?
Sign up to one of our Industry newsletters and you’ll receive our most-recent related news and insights all directly to your inbox!
Sign Up